
Choosing the right Curb Paver can shape how your driveway, garden path, or patio looks and performs for years. A neat edge holds paving in place, defines planting beds, and helps create a clean transition between surfaces. But the best choice depends on more than color. Consider vehicle loads, local weather, drainage, and the style of the surrounding property. A narrow garden border has different demands from a driveway entrance where tires turn and brake.
Start by comparing materials, dimensions, and installation requirements. Concrete pavers offer consistent shapes and colors, while natural stone brings varied textures and tones. Neither option suits every project. Freeze-thaw cycles, standing water, and frequent traffic can affect durability, so check product guidance for your site conditions. The foundation matters, too. A well-prepared base and secure restraint help limit movement over time. Small details count. A sample beside your existing paving can reveal color differences that photos hide. Not always obvious.
This guide explains how to assess curb pavers for appearance, strength, maintenance, and budget. It also highlights questions to ask suppliers or installers, including whether the selected unit matches the project’s load and installation method. Product claims should be checked against technical specifications, not assumed from appearance alone. Even careful planning has limits: soil, workmanship, and weather can influence the final result. That is worth remembering. With clear priorities and practical checks, you can choose a Curb Paver that fits the project instead of simply choosing the most attractive option on display.
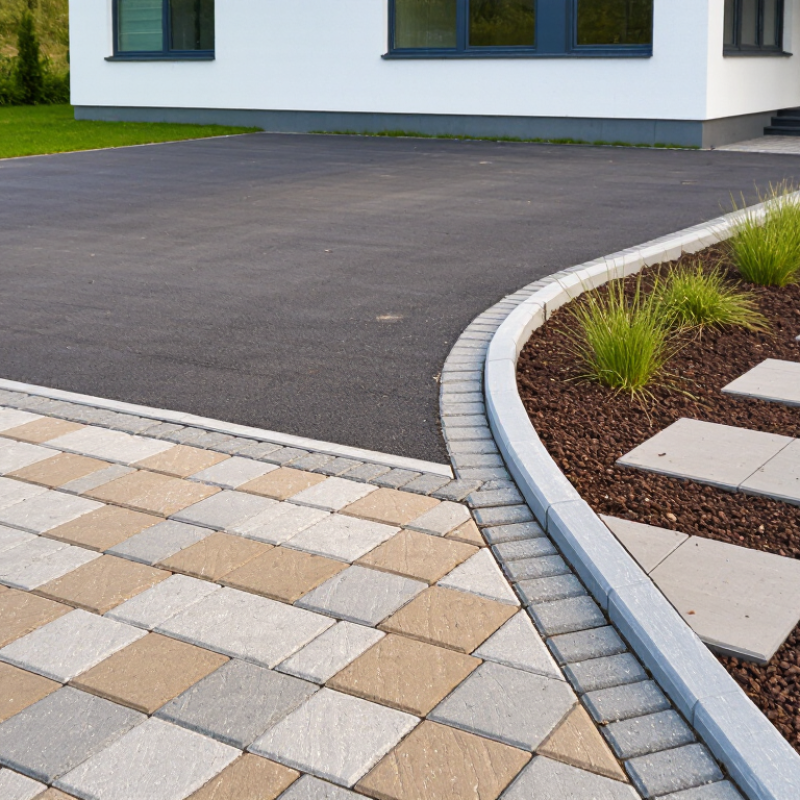
A curb paver has to suit the job, not just the color palette. Is it edging a garden path, containing a driveway, or taking occasional truck turns? Those uses create very different loads. Check where water flows after a hard rain, whether soil stays soft, and where snowplows or delivery vehicles might strike the edge. Small details matter. A narrow gate can also limit the size of units you can install.
Measure the slope and note nearby drains before choosing a shape. NOAA’s Atlas 14 provides location-specific precipitation-frequency estimates; use local rainfall data when assessing runoff and drainage needs. For concrete paver units, ASTM C936/C936M sets a minimum average compressive strength of 8,000 psi and a maximum average water absorption of 5%. These benchmarks help compare products, but they do not replace checking the site’s actual loads and exposure. Freeze-thaw cycles, deicing salts, and a weak base can still cause trouble. I would not choose by appearance alone. A tidy sample can hide a poor fit for the ground beneath it, and that is easy to overlook.
Check the finished route’s grade when planning curb pavers near an accessible path. Under the 2010 ADA Standards, an accessible route’s running slope is limited to 1:20 (5%), and its cross slope is limited to 1:48 (about 2.08%). These limits help inform site grading and drainage decisions; they are not product specifications.
Source: 2010 ADA Standards for Accessible Design, Section 403.3. Verify applicable local requirements and site conditions.
Concrete curb pavers are often chosen for their consistent sizes and practical cost. Their uniform edges make installation easier, especially along straight paths. Look closely. Dense, well-made units can handle regular foot traffic, but quality varies. In freeze-thaw areas, check the product’s stated absorption and durability ratings before buying.
Natural stone offers varied colors and textures, from subtle gray to warm, uneven tones. It can create a strong visual edge, though irregular thickness may require more careful bedding and adjustment. Stone is often heavier and may cost more to install. A sample can look different outdoors, so view it in natural light beside your paving.
Clay pavers bring rich, earthy color and can suit traditional gardens. Their appearance may shift slightly between batches, which some homeowners enjoy and others find frustrating. No material wins every time. Consider how each surface responds to moisture, stains, and local winter conditions, then compare maintenance guidance from suppliers. A small test section can reveal joint width, color contrast, and how the curb meets nearby paving. That extra check may feel fussy, but replacing a poor match later is harder.
How to Choose the Best Curb Paver for Your Project?
Choose a Shape and Profile for the Intended Design
Start with the lines in your plan. Straight curb pavers create crisp borders beside rectangular patios, driveways, and planting beds. For a curved walkway, choose units made to follow a radius, or use shorter pieces that can turn gradually. Tight curves need careful checking: a shape that looks flexible on paper may leave awkward gaps on site.
The top profile changes both appearance and use. Square edges give a clean, modern boundary, while a rounded or beveled edge softens the transition between paving and lawn. Near a driveway, consider how the profile meets vehicle tires and whether the curb needs to hold the paving in place. Along a garden bed, a visible raised edge can contain mulch, but it may also interrupt a mower’s path. Small detail, big effect.
Compare actual samples against the paving and nearby materials. Check the unit’s height and width, then sketch a short section of the edge, including corners and curves. This can reveal mismatched proportions before installation. It is easy to focus on the paver’s face and overlook its side profile. That choice deserves a second look, especially where water, foot traffic, or maintenance will affect the finished edge.
| Shape or Profile | Appearance | Best Suited To | Design and Installation Considerations |
|---|---|---|---|
| Straight rectangular | Clean, linear edges with a simple, consistent face. | Contemporary landscapes, straight paths, driveways, and formal garden borders. | Easy to align in straight runs. For tight curves, use shorter units or a product designed for radius layouts. |
| Chamfered or beveled edge | A small angled edge creates a defined line and softens sharp corners. | Modern or transitional paving where a crisp border is desired without a completely square edge. | Check the chamfer direction and visible face before installation so the profile reads consistently along the run. |
| Rounded or bullnose edge | A smooth, curved top edge gives the border a softer, more finished appearance. | Patios, pool surrounds, steps, and areas where people may sit or walk close to the edge. | Useful where a less sharp exposed edge is preferred. Confirm that the unit’s dimensions and finish suit the adjoining paving. |
| Sloped or ramped profile | A gradual transition from the paving surface to a lower adjacent surface. | Driveway edges, path transitions, and locations where a lower-profile border is needed. | Choose a slope that matches the site’s level change. Do not assume a curb unit alone provides an accessible route; check applicable local requirements. |
| Curved or radius unit | Follows arcs and flowing lines while maintaining a continuous border. | Curved planting beds, circular patios, winding paths, and rounded driveway edges. | Check the specified inside or outside radius and the joint spacing. Small-format units generally accommodate tighter curves more easily than long units. |
| Tapered or wedge-shaped unit | Creates a curve from straight-sided units, often with a subtly segmented outline. | Gradual bends and layouts where matching straight and curved sections is important. | Confirm the taper and intended orientation. A sample dry layout can help reveal joint changes before the units are set. |
| Decorative or textured face | May resemble split stone, aged masonry, or another textured finish. | Traditional gardens, rustic landscapes, and projects where the border is a visible design feature. | Compare the face texture and color with the main paving in natural light. Textured surfaces can be harder to keep visually uniform across batches. |
| Selection note: Available shapes, profiles, and dimensions vary by product. Verify unit measurements, curve compatibility, installation requirements, and local drainage or accessibility needs before ordering. | |||
Assess Durability, Installation, and Maintenance Requirements
Durability starts with the paver’s material, thickness, and exposure. For concrete units, check test documentation against ASTM C936/C936M: the specification sets an average compressive-strength minimum of 8,000 psi and a maximum average water absorption of 5%. These figures help compare products, but they do not guarantee performance if the base settles or water remains trapped. Match the unit to traffic, freeze-thaw exposure, and the curb’s shape. A thicker paver is not automatically better; fit and proper restraint matter, too.
Installation quality is just as important. A firm, well-compacted base, consistent bedding layer, tight joints, and secure edge restraint help limit movement under vehicle loads. Curves and tight corners may require more cutting, which adds labor and can leave weak, narrow pieces. Plan the layout before ordering, and ask the installer how they will handle drainage and replacement access. Maintenance is usually manageable: remove debris, check for rocking units, and replenish joint sand when it washes or blows out. Permeable systems need extra care; the U.S. EPA’s green-infrastructure guidance notes that sediment control and periodic surface cleaning help preserve infiltration.
Tips: Request ASTM test results and a written base-depth plan. Check a sample after wet weather. Small flaws show up then. One trade-off is easy to miss: dark pavers can conceal stains, but may feel hotter in direct sun. Choose for the site, not just the sample board.
A curb paver should fit the project, not just the price tag. Compare the full installed cost, including excavation, base material, delivery, cutting, and edge restraints. A low-cost unit may need more labor if its shape requires frequent cuts along curves. Ask for an itemized estimate, then check what site preparation it includes. Small omissions add up.
Set priorities before choosing a material. For a driveway, favor suitable load capacity and a stable base; for a garden path, appearance and easy maintenance may matter more. Check drainage, freeze-thaw conditions, and how the paver meets existing surfaces. A sample placed beside your home can reveal color shifts in direct sun. It is a modest test, but useful. If the project has a tight budget, simplify the layout before choosing a weaker product. Keep some allowance for unexpected soil or slope work. That allowance is easy to overlook, and estimates can still miss a detail. A durable, plain curb may serve your goals better than a decorative option that strains the budget.