
Choosing a 180 Degree Concealed Hinge starts with the door, cabinet, and space around them—not the product label alone. A hinge that opens fully can make drawers, shelves, and cleaning easier. But the wrong model may collide with a wall, pull against a weak mounting surface, or leave the door sitting unevenly. Small details matter.
Check the cabinet’s construction, door thickness, overlay, and opening clearance before comparing hinge options. Confirm the stated opening angle under the maker’s specified installation conditions; “180 degrees” does not guarantee the same movement in every cabinet. Look closely at the hinge cup, mounting plate, adjustment range, and required drilling pattern. A few millimeters can change whether the door clears an adjacent panel. Measure twice.
No source article or verified expert quotation was supplied, so I can’t responsibly attribute a statement to a named hinge specialist. Rather than invent an expert or quote, this guide focuses on checks that can be confirmed against product drawings and installation instructions. That is less dramatic, but more dependable.
The sections ahead will explain how to match a 180 Degree Concealed Hinge to your cabinet, assess materials and load ratings, and compare adjustment features. They will also cover installation tolerances and common fit problems. One point deserves caution: a hinge’s advertised capacity is not a substitute for checking the door’s size, weight, and mounting strength. Choose from the manufacturer’s documented specifications, then test the movement before fitting the remaining doors.
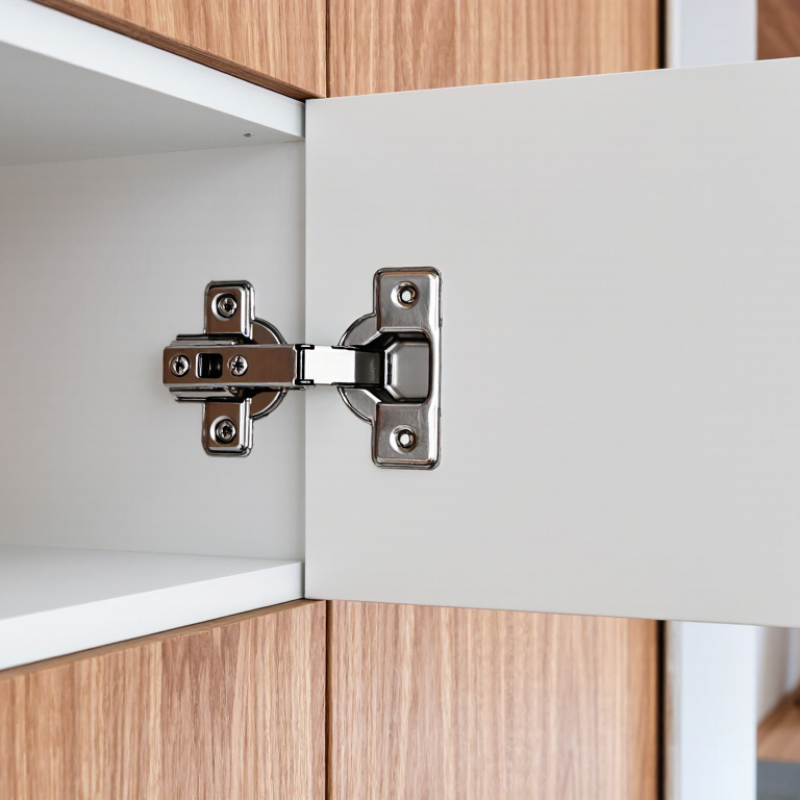
How to Choose a 180 Degree Concealed Hinge?
Define a 180° Concealed Hinge and Verify Its Opening-Angle Specification
A 180-degree concealed hinge is fitted inside a cabinet or door, so the hardware is hidden when the door is closed. Its stated opening angle describes how far the door can swing from its closed position. However, “180 degrees” may refer to a theoretical maximum, not the movement available after installation. Nearby walls, handles, thick door edges, and cabinet frames can all limit travel. Check the hinge drawing for the measurement method and required clearances. A number alone is not enough.
Tips: Compare the technical drawing with your door thickness and cabinet layout. Look for the opening angle under the stated mounting conditions. If the drawing is unclear, ask the supplier to confirm how the angle was measured.
Before buying, check whether the door needs to fold flat against a side panel or simply open widely. Confirm the hinge’s mounting position, cup or fixing dimensions, and adjustment range. These details affect alignment and clearance. For a reliable check, mark the intended pivot point and swing path on a simple sketch, then compare them with the cabinet’s actual dimensions. Even careful measuring can miss a projecting handle or uneven wall. That is worth checking twice. If possible, test one hinge on a sample door before fitting a full set.
| Selection dimension | What it means | How to verify it | Practical decision check |
|---|---|---|---|
| Hinge definition | A concealed hinge is fitted into recesses or mounting hardware so the hinge is largely hidden when the door is closed. A “180°” model is specified for a nominal opening travel of up to 180 degrees, subject to its installation and surrounding geometry. | Check the product drawing and installation instructions. Confirm that “180°” describes the door’s opening travel, not simply a marketing label or an unobstructed clearance guarantee. | Choose a model whose stated function matches the required door movement and installation type. |
| Opening-angle datum | The angle is measured between reference surfaces or lines, but manufacturers may define those references differently. | Find the angle diagram and identify the closed-position reference, the fully open position, and any stated measurement convention. | Do not compare angle figures from different hinges until their reference points and installation conditions are clear. |
| Nominal versus usable angle | A nominal 180° specification describes the hinge’s stated capability. A cabinet side, adjacent wall, handle, or neighboring door can stop the installed door earlier. | Compare the hinge’s stated opening-angle conditions with the actual cabinet layout, door thickness, and nearby obstructions. | If the door must lie fully clear of an opening, verify that the complete assembly provides that clearance—not just the nominal angle. |
| Door and cabinet geometry | Overlay, inset, frame or frameless construction, door thickness, and hinge-cup or recess dimensions affect fit and movement. | Measure the door and cabinet; check the specified mounting style, drilling pattern, recess depth, and required edge distances against the installation drawing. | Reject a hinge if its mounting geometry or permitted door dimensions do not match the project. |
| Clearance and interference | The hinge’s path must avoid the cabinet, adjacent doors, handles, walls, and other hardware throughout the swing. | Review the manufacturer’s clearance drawing or test a correctly mounted sample. Move the door slowly from closed to fully open and check for contact. | Confirm clearance at both the hinge side and the far edge of the door. |
| Load and hinge quantity | Supported door weight and size depend on the hinge design, mounting, door construction, and number and spacing of hinges. | Use the manufacturer’s load guidance for the exact hinge and installation. Include the complete door and attached hardware in the weight estimate. | Do not assume that adding hinges increases capacity in a simple proportional way; follow the specified layout and limits. |
| Adjustment and stop function | Some hinges allow door-position adjustment, while opening stops or soft-close features may affect the final movement. | Check which adjustments and accessories are included, and whether an optional stop limits the opening angle. | Make sure the required opening angle is compatible with any stop, damper, or other selected accessory. |
| On-site angle test | A physical test confirms the installed hinge’s actual movement under the project’s geometry and mounting conditions. | Install the hinge as instructed, mark the closed reference, open the door to its natural stop, and measure the angle with a protractor or angle gauge using the drawing’s reference surfaces. | Record the measured angle and check for binding, contact, loose fasteners, or abnormal movement before final installation. |
A 180-degree concealed hinge must match the door thickness, overlay, and space available beside the cabinet. Measure the door at several points; paint or edge banding can change its finished thickness. A 19 mm door is common in cabinet work, but never assume yours matches. Overlay is the amount the closed door covers the cabinet side. Measure it with the door shut, from the cabinet edge to the door edge. Small differences matter.
Next, check the hinge’s technical drawing for the required cup depth, setback, and mounting-plate position. Measure clearance from the door’s outer edge to nearby walls, trim, or adjacent doors. A hinge may open to 180 degrees yet still collide with a handle or wall. ANSI/BHMA A156.9-2020 covers cabinet-hardware performance testing; it does not prescribe one universal clearance for every hinge. Use the hinge maker’s stated dimensions for your specific model. I still double-check the drawing against a physical sample when the fit is tight.
Tips: Make a cardboard door mock-up and swing it through the full opening arc. Mark contact points with pencil. Measure twice. Keep the mock-up’s thickness and overlay true to the finished door, and leave the specified clearance rather than guessing.
Check whether the stated load is for one hinge or a complete pair. The distinction changes your calculation. If a door weighs 30 kg and the rating is 20 kg per hinge, two hinges do not automatically provide a reliable 40 kg capacity. Door width, hinge spacing, installation accuracy, and repeated opening affect how the load is shared. A wide door can pull harder on its hinges than a narrow door of the same weight. Check the hinge maker’s load table for the exact configuration.
Weigh the finished door, including glass, handles, and attached panels. Then compare that figure with the rating for the number of hinges you plan to install. If the rating is per pair, compare the door’s weight with that pair rating; do not treat it as a per-hinge figure. If it is per hinge, follow the maker’s guidance on hinge count and spacing rather than simply adding ratings together. Leave a sensible margin when possible. A door that weighs 28 kg may seem fine on a 30 kg rating, but frequent use or a broad panel can make that choice less comfortable. I would recheck the specification before drilling.
A 180-degree concealed hinge is only useful if its adjustment suits the cabinet around it. Check the stated 3D range for side, height, and depth movement; a hinge with ±2 mm in each direction, for example, offers a clear correction window. Confirm those figures in the product drawing, not just a sales description. On site, a slightly out-of-square carcass can turn a small adjustment gap into a visible door mismatch. More range is not always better: it cannot fix a badly positioned mounting plate.
Mounting pattern matters just as much. Compare the cup diameter, cup depth, screw-hole spacing, and plate position with the door and cabinet. EN 15570:2008 sets strength and durability test methods for furniture hinges, but it does not confirm that a particular hinge will fit your existing holes. Measure twice. A paper template helps, though real panels may still vary. Avoid assuming that two hinges described as “180 degree” share the same drilling pattern.
Check material grade and test evidence, too. Stainless steel grade 304 is a common choice for damp kitchens; grade 316 offers greater corrosion resistance, but may cost more than the application needs. Ask for the actual grade and finish, plus a corrosion-test report. ISO 9227 defines salt-spray testing methods; it does not set one universal pass time for every hinge. That distinction is easy to miss. Match the reported test duration and acceptance criteria to the exposure expected in your project.
A 180-degree concealed hinge is useful only if it survives repeated use and opens fully without collisions. Check the cycle-life rating and the conditions behind it. Ask whether the test used a door close to your panel’s weight and size. A light test door may not predict performance on a heavy cabinet front. For frequently used doors, allow a sensible margin above estimated daily cycles. A high rating alone is not enough; confirm the hinge also supports the door’s load.
Next, check clearance at the actual 180-degree position. Open a sample door slowly and inspect the space near handles, adjacent doors, drawer fronts, and wall returns. Small gaps matter. A hinge may reach 180 degrees in a specification yet still let the door strike nearby hardware. Measure with the door fully open, not at a partial angle. Overlay, mounting depth, and panel thickness can change the result. It is easy to trust a drawing too much; give the real installation a second look. When space is tight, make a full-size mock-up with the intended door weight. If the door binds or shifts, adjust the hinge position before production.
Check the cycle-life rating and confirm clearance with the door open to a full 180°.
Estimated annual cycles assume 365 days of use and count one complete open-and-close as one cycle. Compare your expected use with the hinge’s documented cycle-life rating. These figures are usage estimates, not product ratings. For 180° operation, check the actual door, frame, hardware, and surrounding space at the full opening angle.